Welcome to Tesla Motors Club
Discuss Tesla's Model S, Model 3, Model X, Model Y, Cybertruck, Roadster and More.
Register

Tein EnduraPro Plus adjustable shock absorbers fitted

This site may earn commission on affiliate links.
image0.jpeg

So I loosened the 13mm bolts on the FUCA to get it out of the way to pull the front strut out. Do I need to put it down and tighten it at a certain spot, or do I just eyeball it and tighten it after I put the new shock in and ball joint?
 
Any verdict on if the top hat should be trimmed or just use Tesla’s. The email response from Tein seems to suggest to use the full top hat. Thanks
I think you mean the bump stop. The consensus seems to be that you definitely do not want to use the original unchanged because it's too long and will stop the auto-damping from working but you might want to use it cut down (middle section removed) to ensure that it doesn't crash and perhaps to take some pressure off the auto.
 
View attachment 979325
So I loosened the 13mm bolts on the FUCA to get it out of the way to pull the front strut out. Do I need to put it down and tighten it at a certain spot, or do I just eyeball it and tighten it after I put the new shock in and ball joint?
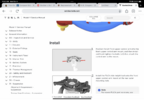
If you’re talking about these two 13mm bolts, then, yes, they need to be tightened at a specific position.
See this link for instructions. https://service.tesla.com/docs/Mode...UID-B9D351E6-14AE-4EF7-A99E-F4E822047690.html
 

Attachments

  • IMG_0926.png
    IMG_0926.png
    751.4 KB · Views: 68
I had the Tein Endurapro Plus installed on my 2022 MYP yesterday by a company who specialize in high performance alignments and suspensions. My initial reaction is that the Teins provide a noticeable improvement in ride comfort. A 60+ mile highway drive home was a pleasure. The street ride is noticeably smoother but it is still on the stiff side. I'll need more miles before I make a final verdict, but I am impressed so far.

FYI, the install included full unmodified bumpstops, dust boots installed in the OEM position, and stock MYP springs. The Teins are set at 10f/12r. The mechanic who installed the Teins said it was a simple install. I didn't notice him experiencing any problems during removal or install. His word of warning for DYIers is be careful with the springs. They are heavy duty and need a good strong compressor.
 
  • Informative
Reactions: GOVA
I thought it was worth adding a thread here in the Model Y Driving Dynamics section to talk about the above suspension upgrade. There is a good thread in the Model 3 area here Tein EnduraPro Plus - Review and I’m sure a lot of it is transferable and relevant to both models, but there are obviously going to be subtle differences.

I‘ve just received a set, and today have fitted the rears with my initial thoughts below (also posted this in the Model 3 forum).

I fitted the rear shock absorbers this afternoon, it was incredibly easy and if I hadn’t done some stupid things like leave the dust cover and bump stops off and only notice after I’d refitted and torqued everything up on the first side, then I’d say it would have taken me in total about 45 minutes.

Some points of note;
  • The shocks I received have 26/27 ‘clicks’ of adjustment instead of the 16 which has been widely mentioned here and elsewhere. I have currently set mine at 6 clicks from the softest setting.
  • I was expecting to have to remove far more bolts than I actually needed to. The procedure is basically;
    • Jack the car up, remove the wheel
    • Unclip the wheel arch liner with three pull out fasteners
    • Remove the lower control arm plastic cover with a single bolt
    • Loosen but not quite remove the two upper top hat bolts
    • Remove the single lower bolt which holds the bottom of the shock into the control arm
    • Carefully remove the two upper bolts and the whole shock will drop down (be prepared to catch it 😂)
    • Remove shock, it might need compressing by hand a tiny bit to get it out
  • Once the OEM shock is out, the top hat, dust cover and bump stop need to be transferred over to the Tein. @Heckraiser makes the right decision IMHO by cutting and only using the top part of the bump stop, and putting the dust cover on upside down.
    • The bolt keeping the top hat on will spin the piston rod so you’ll need to find a way to stop this happening, I used a locking mole grip and a piece of rubber to prevent damage to the rod and add a bit more grip. The same is true for putting the Tein bolt back on.
  • I actually think that it will be possible the get at the adjuster on top without taking the shock absorber out. The top hat sits proud of the bodywork by at least a couple of inches because of some box sections. I should be able to get to the adjuster with fingers by just taking the wheel off and unclipping the arch liner and a rubber dust cap which sits over the top of the mount. If not, then just unbolting the two top bolts and angling the shock absorber towards you a bit will definitely allow it.

I found two great videos which helped;
1. Rear -

2. Front -
(I’ll follow this when I get around to doing the fronts.


How does it drive with just the rears swapped? Well, I’ve only done a brief 10 minute test over a route I’m very familiar with and it does seem that a good amount of the low speed ‘bounciness’ that I didn’t like has gone away. I can definitely feel that the front is stiffer so hoping that changing the front shock absorbers will fix this and get rid of the rest. The car always felt unsettled and bouncy to me at lower speeds as if it had been badly lowered, but actually over 40-50mph depending on the road it was OK. I have a longer drive coming up tomorrow which will involve motorways so I’ll also report back after that. I’m hoping that I’ll be able to fit the fronts at some point next week as I’ve ordered a spring compressor which I understand is needed for the fronts in order to get the top hat off.
Your post will be very helpful indeed when I come to fit these; thank you. Do you know the torque settings for the bolts that have to be undone?
 
I had some squeaking from my rears and the installer removed the dust boot which solved the problem. I also changed the settings from 10/10 to 12/12. So far the ride feels really good and soft while handling is good. I’m gonna try more hard curves to feel it out more.
 
FYI, the Tesla Service Manual is available online at service.tesla.com. Torque specs and everything else you might need for repair is readily available. It includes step by step videos of the repairs.
 
For the DYIers, here are links to Tesla's removal and replacement of the front and rear dampers. They include torque specs and videos that should illustrate how Tesla does the job. You will need to create your own account to get to the site.
 
  • Like
Reactions: giomgiom
For the DYIers, here are links to Tesla's removal and replacement of the front and rear dampers. They include torque specs and videos that should illustrate how Tesla does the job. You will need to create your own account to get to the site.
I’ve logged in with my Tesla account and all I get (briefly) is this page which then redirects to the Service home page.
1696527390354.png


Trying to access any of the service manuals directly then does the same thing. There’s an option to subscribe for a number of days or hours but this is for diagnostic software as well.
 
I’ve logged in with my Tesla account and all I get (briefly) is this page which then redirects to the Service home page.
View attachment 979866


Trying to access any of the service manuals directly then does the same thing. There’s an option to subscribe for a number of days or hours but this is for diagnostic software as well.
That's odd. I use my Tesla account and password. Did you try creating a new account?
 
I think you mean the bump stop. The consensus seems to be that you definitely do not want to use the original unchanged because it's too long and will stop the auto-damping from working but you might want to use it cut down (middle section removed) to ensure that it doesn't crash and perhaps to take some pressure off the auto.
Tein specifically says to use the OEM bump stops unmodified because they have the same travel distance as OEM struts. The smaller 2/3 segments are extremely soft and you can compress them with your fingers, they are there to create a smooth transition to the harder segment that actually stops your strut from damage. In conclusion: you should use the full OEM bumps stop, there is no need to cut it. If you do cut, it will just cause a harsher slam when you bottom out. Despite my own advice, I went ahead and cut off the smaller 2/3 and kept only the top widest portion which is needed to pressure mount the top of the boot to the top hat. I did this because most people recommended cutting it despite having done zero research or reaching out to the manufacturer for clarification. This is a classic case of bro-science or an old wive’s tale. If I had to do it again, I’d leave the bump stops uncut. There was also confusion about Hydraulic Bump Stoppers in the Endurapro, but despite having HBS, Tein specifically says to use the original bump rubbers unless Tein provided you with new ones.
IMG_0076.png