Welcome to Tesla Motors Club
Discuss Tesla's Model S, Model 3, Model X, Model Y, Cybertruck, Roadster and More.
Register

Blaujunk - Roadster audio/NAV options

This site may earn commission on affiliate links.
That website is weirdly devoid of information:

I found an old site that includes the pdf of VRVD640G - In-Dash GPS Navigation Receiver
with DVD Player CD-RW SD USB MP3 decoder AM/FM radio tuner
Shop Roadmaster car stereos, GPS head units, cd players, radios
VRVD640G3.jpg


And this http://vr-3.com/
 
Last edited:
With apologies to the Roadster owner running VR3, I don't exactly associate VR3 with the highest quality products. I see them selling low priced, high volume goods at Costco, Walmart and such. Hopefully their "Elite professional series" is a serious cut above their low end stuff.
 
Last edited:
Thanks for the vote TEG

Greetings.

A little bird told me that there is a Bluetooth version replacing the older 640g.

TEG, Wal-mart, Costco, Target etc. don't sell cheap crap. They sell quality
goods just a little cheaper than the other guys. In much larger volumes. Other makes available at these stores include, SONY, Alpine, JVC, Pioneer not forgetting Clarion, Kenwood and others.

So please don't confuse a good deal with being substandard in any way.
 
I bought a VR3 backup camera & bluetooth handsfree adapter at Costco. The lense on the backup camera kept fogging up and the visor clip on bluetooth adapter snapped off right away. I have opinions about those products based on personal experience, not just judgements based on what stores carry them.

Still, the prices were so low that I wasn't surprised.
 
Just took delivery; the Blaujunk is gone, mine came with a JVC KD-R900 and some nasty speakers however, the unit is I beleive quite good and included BT hands-free and audio + USB in the front and in the center console.

It's a shame it doesn't have NAV but, I'm re-considering simply using an occasional nav unit.

I'd planned both a head unit (Kenwood) and speaker (my design based on Tang Band parts) upgrade but might just stick with the speakers alone.

Let's see...
 
Last edited:
Just took delivery; the Blaujunk is gone, mine came with a JVC KD-R900 and some nasty speakers however, the unit is I beleive quite good and included BT hands-free and audio + USB in the front and in the center console.

It's a shame it doesn't have NAV but, I re-considering simply using an occasionaly nav unit.

I'd planned both a head unit (Kenwood) and speaker (my design based on Tang Band parts) upgrade but might just stick with the speakers alone.

Let's see...

I believe the Blaujunk story went like this. The cars came with it as stock and Martin complained about it so a High end JVC with Nav was offered but at a new $3K price with the electronics package. They still had the Blaujunks around so it was the stock radio that came in the car. That's what's in Roadster#500. Sounds like they might have cleared the shelves of those since you must have not ordered the upgrade and got a JVC without Nav.

By the way, The Blaujunk has a Bluetooth phone/mic and an IPod input (without any controls). Not too bad really it's just the reception is worse than horrible because Tesla decided that there would be no antenna outside the car or would not spring for an in windshield wire. Crazy thinking (or lack of thinking) to me.

Oh, and the speakers stink.
 
Speaker swap out; Does anyone know how to remove the existing speakers? I'm about to try to do that and wondered if anyone had experience before I start tugging at bits and peices?

Thanks.

I'd suggest doing a search and/or asking your question over at lotustalk where I'm sure many have done this. Be careful not to scratch your dash or the windshield.
 
I've been following this thread, but I am having a hard time determining if the people contributing to this thread are doing the install work themselves.

What I can glean from the posts is that owners of the Roadster 1 can figure out how to tear down their car from Lotus experience. But what about the Roadster 2? Is the new interior also a Lotus item? Does anyone have experience with taking apart the interior of a Roadster 2? Where might one get such info?

Also, where does one install the subwoofer? Also, does anyone know if an antenna (windsheild wire) was installed in the Roadster 2?

Reason: for $3,000, I can have the sound system of my choice installed. The Tesla option is less than ideal.

Thanks
 
Dash mount speaker removal and low-pass filter install

To remove the dash speaker you’ll need:
  • A strong paper clip
  • A right angled Philips #2 screwdriver
  • Patience
Difficulty level: Easy
Vehicle: 2010 Tesla Roadster

0 The dash speaker.

1. Remove the grill
Use an opened out paper clip through one of the thousands of holes in the side of the grill to lift it up and out, there are no screws or glue it’s simply pressed in. Take care to ease it out.

2. Screws
Use a right angle screwdriver to carefully turn the four screws holding the driver down. The risks are here! Take care not to slip off the screw and puncture the driver nor slip up and bash the screen. This is where you need the patience! I also used the screwdriver bit from an electric screwdriver in my fingers to remove the screws once they were loose.

3. Low Pass filter
At this stage you can lift out the driver, it’s soldered (nice) to the wiring and if you pull the wire you’ll find the connector. As part of my sound solution I’m keeping the in-dash speakers. In my estimation they’re quite good as midrange drivers so, I’ve placed a 1.8mHy indictor in line with the driver to create a 6dB filter at 3½Khz where they start to falter. At higher frequencies the window starts to join in and spoil the fun!
 

Attachments

  • 0. Dash speaker.JPG
    0. Dash speaker.JPG
    1.6 MB · Views: 286
  • 1. Remove the grill.JPG
    1. Remove the grill.JPG
    1.6 MB · Views: 295
  • 2. Screws.JPG
    2. Screws.JPG
    1.7 MB · Views: 274
  • 3. Low pass filter.JPG
    3. Low pass filter.JPG
    1.5 MB · Views: 275
How to remove the interior door panel to wire your own tweeter

To open the door panel you’ll need:
8mm driver with a fine shoulder, i.e. it needs to fit in a narrow hole
8mm spanner/wrench (not essential)
Super glue (if needed)

Difficulty level: Medium
Vehicle: 2010 Tesla Roadster

Please note that it’s clear that the door skin is designed to be installed and never removed, the push in plastic fasteners are only to be used once but can be re-used if you dismantle them carefully. It’s also important to note that the four bolts holding the door panel are driven into press fit bolts that are pressed into the fiberglass door frame; they’re ok but don’t take any abuse. It’s very important to take care on re-assembly; always start the bolts using your fingers or using finger pressure, don’t re-apply the bolts using a power tool or even a large wrench; if you cross-thread the bolt as it goes in it is game over and you’ll run the risk of damaging the door. Using fingers only ensures that you feel the cross-thread before damage is done.

1. Starting
THERE ARE FOUR BOLTS holding the door panel on plus a few push in clips; if you don’t have four bolts in your hand before pulling the door panel off something will break! The four bolts are located as follows:

1. Top of the handle; the cover of the handle pulls off, it’s held by spring clips and a little soft glue
2. Bottom of the handle; this one is tricky as access to the bolt is through a narrow channel. As you unscrew this, keep the bolt in place so that it doesn’t fall. Lift the handle out and down. Don’t panic if you drop the bolt you’ll get it back later. Take note that the bolt does come out at an odd angle - remember that when returning the bolt
3. Back of the door insert; check the diagram; you see where I’ve circled the front and back of the door insert; that’s where the other two bolts are. They can be reached by carefully lifting back the insert; pull too hard and you’ll pop off the mounts (that’s where the super glue comes in). This is where I recommend using the regular spanner/wrench as that requires less flexing of the door insert.
4. As 3. But can be found at the front of the door card.

2. Panel off
Once the bolts are out, you can begin pulling the panel off; work round the panel using a sharp tug as you go around popping off the clips. Take two laps if need be! The picture highlights the captive nuts pressed into the door and the speaker cable connection at the bottom that we’re looking for. Also, notice the screws holding the missing tweeter blanking plate in; these should be removed to install your own. Don't forget that the panel is still attached to the door at the window switches!

3. Added my wires
I removed the connector and soldered on my own extension lead. The Black/tracer wire is the speaker negative.

4. Cable laced in
The cable, once attached should be taped down; anything that moves can rattle!

5. Finished result
I added a pair of Tang-Band 25-1719S tweeters and wired in series a 10uF capacitor to create the right 6dB roll point to match the modified dash drivers.

I screwed the drivers to the panel using matching black screws but may do more to improve the look in time.
 

Attachments

  • 1. Starting.JPG
    1. Starting.JPG
    613.6 KB · Views: 269
  • 2. Panel off.JPG
    2. Panel off.JPG
    547.2 KB · Views: 359
  • 3. Added my wires.JPG
    3. Added my wires.JPG
    1.5 MB · Views: 280
  • 4. My cable laced in.JPG
    4. My cable laced in.JPG
    1.5 MB · Views: 278
  • 5. Finished result.JPG
    5. Finished result.JPG
    1.5 MB · Views: 269
MPT, Thanks a lot! That will be very helpful.

Did you need to do any dash disassembly for the head unit? Did they install an antenna into the windshield for model year 2010?

Also, i was thinking of getting the base head unit and upgrading to a better GPS/iPod controller head unit. Safe to assume, the GPS antenna will need to be installed. So, I'll probably need to wire for GPS under the dash.

Also, where would a subwoofer go, and how big can it get?
 
I am working on having a system installed right now, and have learn that there isn't power enough for the amplifier needed for a real sub. If you take a look at the work Al & Ed's did on Dr. Taras's car, they installed a seperate battery to power the amp for the sub. Unfortunately, that battery needs to be seperately charged. I'm pretty sure they built an enclosure and put it in the passenger footwell. Too much trouble, as far as I'm concerned. I'm probably going to go with just component speakers, with the tweeters in the door (in that obvious place), and some nice bass in the rear.
 
Did you need to do any dash disassembly for the head unit?

I have the basic head unit; the JVC R900.

Did they install an antenna into the windshield for model year 2010?

I can't say; FM reception is not great

Also, i was thinking of getting the base head unit and upgrading to a better GPS/iPod controller head unit. Safe to assume, the GPS antenna will need to be installed. So, I'll probably need to wire for GPS under the dash.

Also, where would a subwoofer go, and how big can it get?

I did the same but, when the car arrived and I looked at the effort and then the performance of the basic unit I reasoned this; too hard!!! (anyone want a cheap, unused Kenwood KVT-514+BT+GPS?)

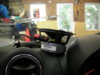
The JVC unit has reasonable iPhone/iPod control and they wire a USB to the center console. Ten minutes work and you can drop a standard iPhone USB plug into the iPhone dock that TM provides, I used a little double sided tape to mount it and stuffed the gap with foam to create a neat and efficient iPhone dock.

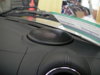
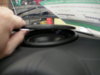
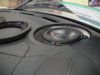
I'm planning to install (soon) these sub woofers http://www.tb-speaker.com/detail/1208_03/w5-1138sm.htm into the rear speaker locations. I'll use a low pass filter to create bass/sub-bass at the rear, mid on the dash and treble from the front. I'll post my results; so far, mid and treble up front is installed and working well.

My only complaint with the base unit, and this may be more a Roadster 2.0 issue; the microphone for Phone integration is poor, even ineffective. I'm not fussed about FM, I get better reception on AT&T 3G via my iPhone!

WRT Navigation; I'm using the iPhone with 'CoPilot Live' It's ok, you can listen to the iPod and navigate at the same time but GPS sensitivity is modest at best.

One note of warning; when you set this all up you'll need to get used to wrangling a JVC head unit, its bluetooth and the iPhone; it's all a bit disjointed at first but does come together. I start (boot, engage, init.?) the car then wait a moment whilst the bluetooth connects - this allows the iPhone to stream audio to the JVC but that's not what I want... After a few seconds I drop the iPhone into the dock and start WunderRadio to listen to the world or use the JVC unit to navigate the iPhones iPod.
 
I have the basic head unit; the JVC R900.

Great stuff MPT (I think). I hope you are taking pictures to post along the way.

I have the Blaujunk. I was told the antenna is laid inside the dash. Compare that to GM products that have two different types of antenna localed in the car to assure no loss in reception.

I forget where the GPS antenna is for JVC but I heard that putting in a steel plate as an antenna in the dash high point helps that reception.