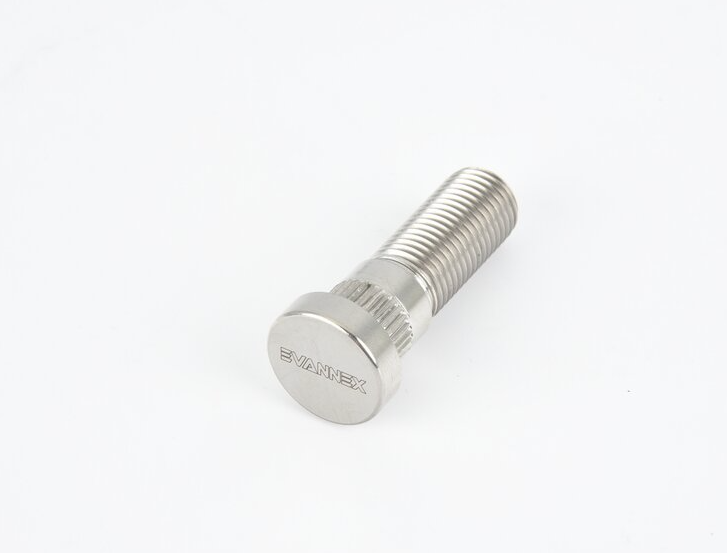
Found some threads on Model 3 extended stud replacements, but nothing really on Model Y. It seems our choices are ARP, Dorman, or MPP studs. I decided to bite the bullet on MPP studs, after trading some emails with Jesse from MPP regarding the install - which apparently install without requiring hub removal. Seemed easy enough. Remove the caliper and rotor, then swap the OEM ones for the longer MPP ones.

To start the rear stud install, you'll need to jack up the rear of the car, pull the wheels off, and then get back into the car, and put the car into "Tow Mode". Tow mode lets the rear hub rotate without the parking brake engaged. When you engage tow mode, you'll hear the rear parking brake disengage, and you should be able to grab and spin the hub by hand.

Next step is to remove the caliper bolts. Two per brake caliper, and you'll need an E18 external torx. For reference, the following pics for the rear install is driver rear, so front of the car is to the left of the pictures.

Take the two caliper bolts out completely, and set the brake caliper to the side, but suspended so that it's not pulling on the brake hose. I set mine on top of a toolbox.

Next three T30 torx bolts hold the heat shield on. Remove those. Some people don't like the heat shield, so they end up using tin snips to cut them off. I kept mine, and just rotated the heat shield out of the way, while installing the studs.

Then thread on a lug nut to hammer on, and tap the nut a few times. It doesn't take a ton of force, and I found that 2-3 medium strikes worked the best. The nut is there to protect the threads (in case you wanted to reinstall the OEM studs for some reason), so if you dont plan to save them, can probably just tap the studs themselves.

You will be able to fish the OEM stud out the back, by rotating the heat shield out of the way. You can feed the MPP stud in from the same location. OEM one drops out easy, because it's short. The MPP one is exactly sized so that you have to really mess with it to get it in. This was a combo of rotating the hub back and forth and "screwing" in the stud to get it to clear the spindle. The fit is incredibly tight, and if the stud were any tiny bit longer, no way they would have fit without hub removal. Good job here MPP!

Once past the spindle, the head of the MPP stud will hit the rubber seal. There are two options here. 1) Lube up the MPP stud head and rotate it back and forth, and try to get the head to slide over the seal, or 2) Cut a groove into the rubber seal. Then use the groove to get the heads of all the studs to pass by. I ended up using WD40 to squeeze the heads by the seal on one side, and just cut a groove on the seal when I did the passenger side.

Once the head of the stud is past the rubber seal, pull the stud into place with the OEM lug nut. Some people use washers or spacers to do this, and I've done that method in the past, but this time I used Lisle 22800 stud installer tool. It is worth every penny! Made pulling in each stud, a piece of cake. To keep the hub from rotating, you can just jam a socket extension into one of the holes to hold the hub in place, while you pull the stud in. No need to tighten fully at this point, just get the heads flush with the hub.

Repeat the process, until all the studs are installed. On the last one, you won't have the hole to insert the socket extension to hold the hub in place, but you can leverage off two of the existing installed studs and use a breaker bar to get that last stud flush with the hub. Again, no need to full torque yet.

To start the rear stud install, you'll need to jack up the rear of the car, pull the wheels off, and then get back into the car, and put the car into "Tow Mode". Tow mode lets the rear hub rotate without the parking brake engaged. When you engage tow mode, you'll hear the rear parking brake disengage, and you should be able to grab and spin the hub by hand.
Next step is to remove the caliper bolts. Two per brake caliper, and you'll need an E18 external torx. For reference, the following pics for the rear install is driver rear, so front of the car is to the left of the pictures.
Take the two caliper bolts out completely, and set the brake caliper to the side, but suspended so that it's not pulling on the brake hose. I set mine on top of a toolbox.
Next three T30 torx bolts hold the heat shield on. Remove those. Some people don't like the heat shield, so they end up using tin snips to cut them off. I kept mine, and just rotated the heat shield out of the way, while installing the studs.
Then thread on a lug nut to hammer on, and tap the nut a few times. It doesn't take a ton of force, and I found that 2-3 medium strikes worked the best. The nut is there to protect the threads (in case you wanted to reinstall the OEM studs for some reason), so if you dont plan to save them, can probably just tap the studs themselves.
You will be able to fish the OEM stud out the back, by rotating the heat shield out of the way. You can feed the MPP stud in from the same location. OEM one drops out easy, because it's short. The MPP one is exactly sized so that you have to really mess with it to get it in. This was a combo of rotating the hub back and forth and "screwing" in the stud to get it to clear the spindle. The fit is incredibly tight, and if the stud were any tiny bit longer, no way they would have fit without hub removal. Good job here MPP!
Once past the spindle, the head of the MPP stud will hit the rubber seal. There are two options here. 1) Lube up the MPP stud head and rotate it back and forth, and try to get the head to slide over the seal, or 2) Cut a groove into the rubber seal. Then use the groove to get the heads of all the studs to pass by. I ended up using WD40 to squeeze the heads by the seal on one side, and just cut a groove on the seal when I did the passenger side.
Once the head of the stud is past the rubber seal, pull the stud into place with the OEM lug nut. Some people use washers or spacers to do this, and I've done that method in the past, but this time I used Lisle 22800 stud installer tool. It is worth every penny! Made pulling in each stud, a piece of cake. To keep the hub from rotating, you can just jam a socket extension into one of the holes to hold the hub in place, while you pull the stud in. No need to tighten fully at this point, just get the heads flush with the hub.
Repeat the process, until all the studs are installed. On the last one, you won't have the hole to insert the socket extension to hold the hub in place, but you can leverage off two of the existing installed studs and use a breaker bar to get that last stud flush with the hub. Again, no need to full torque yet.